Overview
Analyze Pulse is a special overview dashboard which will monitor and consolidate data from the dashboards all across your Analyze environment. You can also build data alerts that will automatically inform you and selected others when your specified data tracking parameters have been met. This special dashboard help you to stay on top of your most important KPIs.
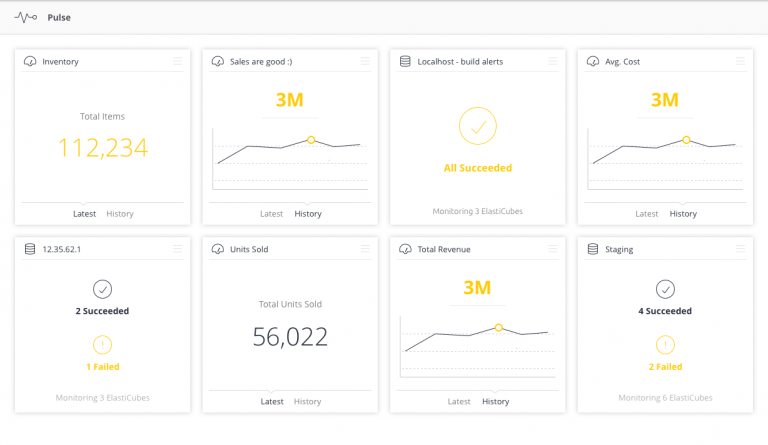
Managing Your Pulse Dashboard
This section explains how to create, duplicate, and delete your Pulse tiles. Once you have created a Pulse tile, you can create an Alert which will automatically notify you and selected Users based on your selected parameters.
Creating Tiles
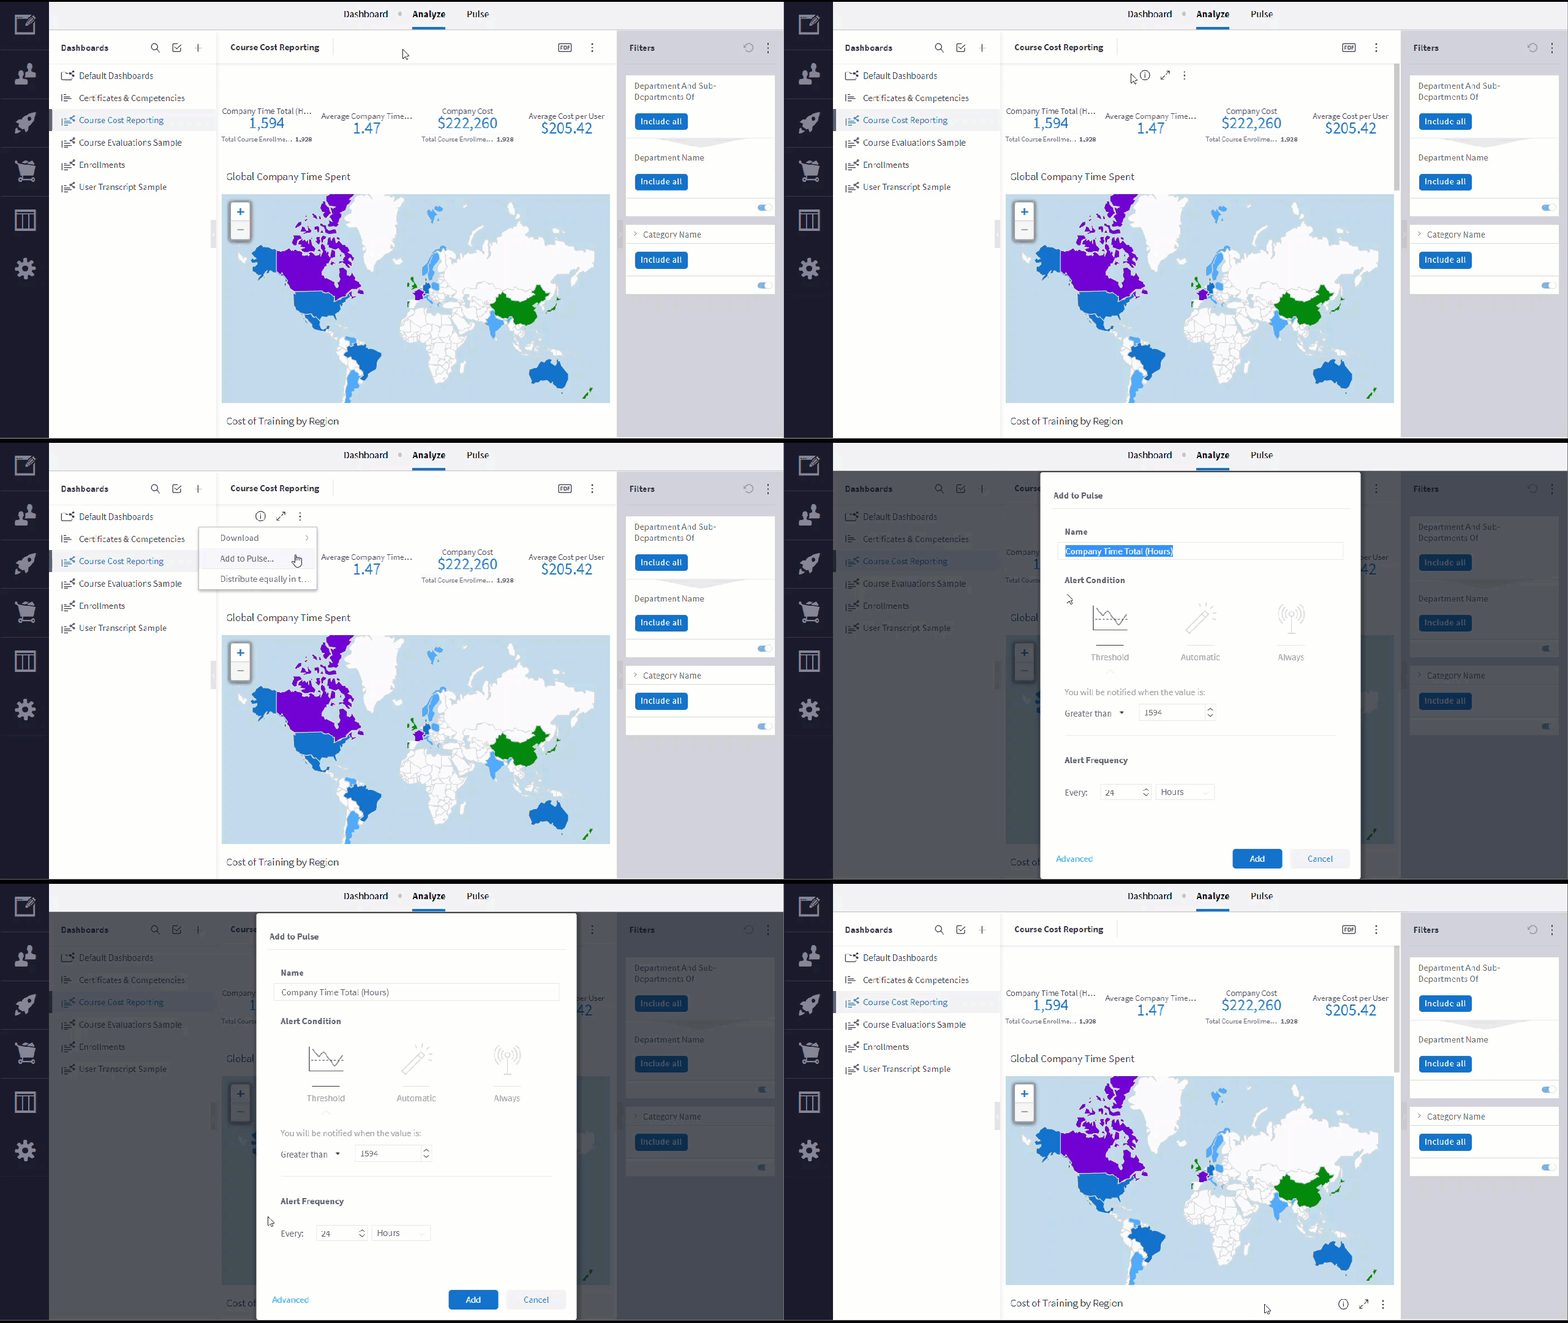
Step 1: Navigate to the Dashboard that contains the data you would like to add to your Pulse dashboard.
Step 2: Determine which tile you would like to add, and then select " " on the top right of the tile. Then, select Add to Pulse.
Step 3: Select the parameters in which you would like to be alerted. For example, if it is a tile displaying Enrollment numbers, you could set it to alert you if the numbers go below a certain threshold. If you are interested in learning more about Alerts, please read the Data Alert Administration section below in this article.
Step 4: Select Add to save this new tile to your Pulse dashboard with the Alert settings.
Duplicating Tiles
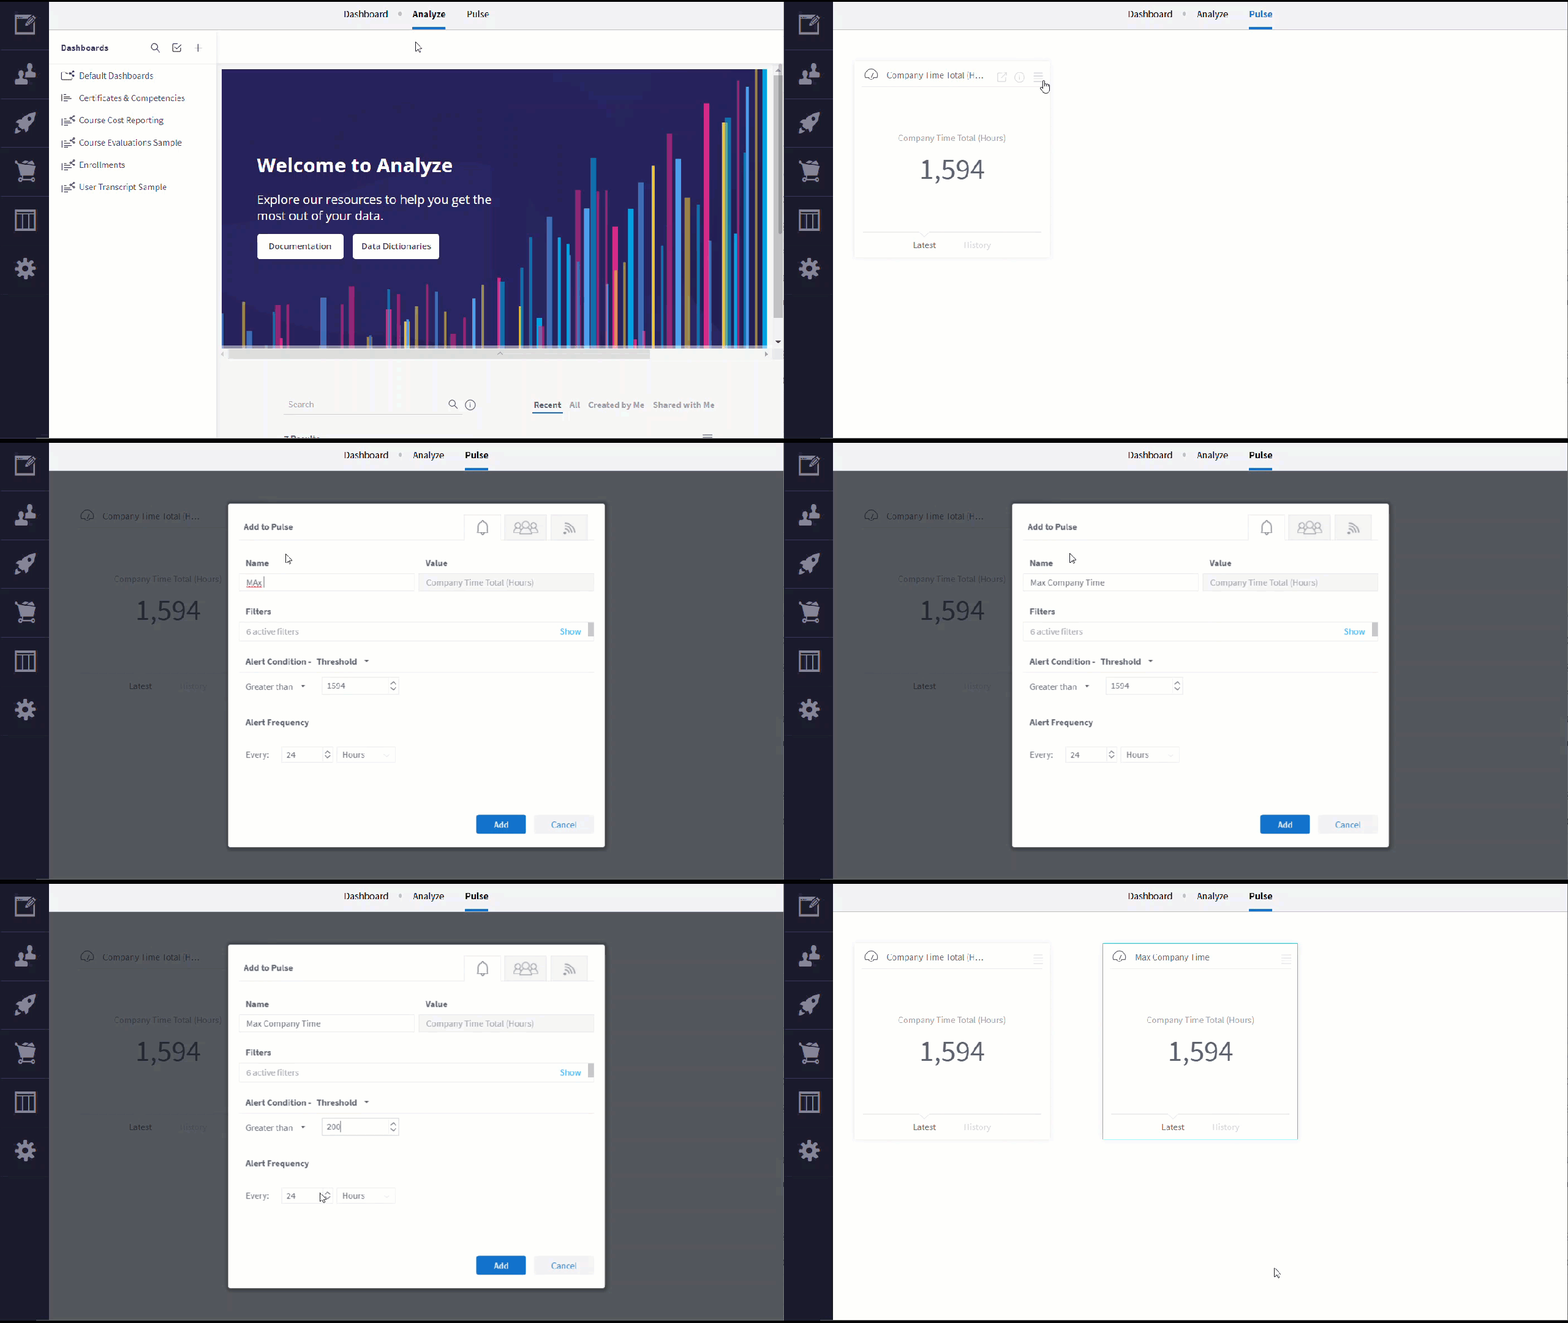
You can create copies of alerts and modify them to quickly generate new alerts with different notification messages or notify various groups across separate channels. This is useful if you would like Alerts for more than one parameter on the same Tile's data.
Steps to Duplicate a Tile:
Step 1: Navigate to the Pulse Dashboard from the main Analyze menu.
Step 2: Determine which tile you would like to duplicate, select " " on the top right of that tile, and then select Duplicate.
Step 3: The Add to Pulse workspace will launch. This allows you to select the parameters in which you would like to be alerted for this duplicate tile. If you are interested in learning more about Alerts, please read the Data Alert Administration section below in this article.
Step 4: Select Add to save this new tile to your Pulse dashboard with the Alert settings.
Deleting Tiles
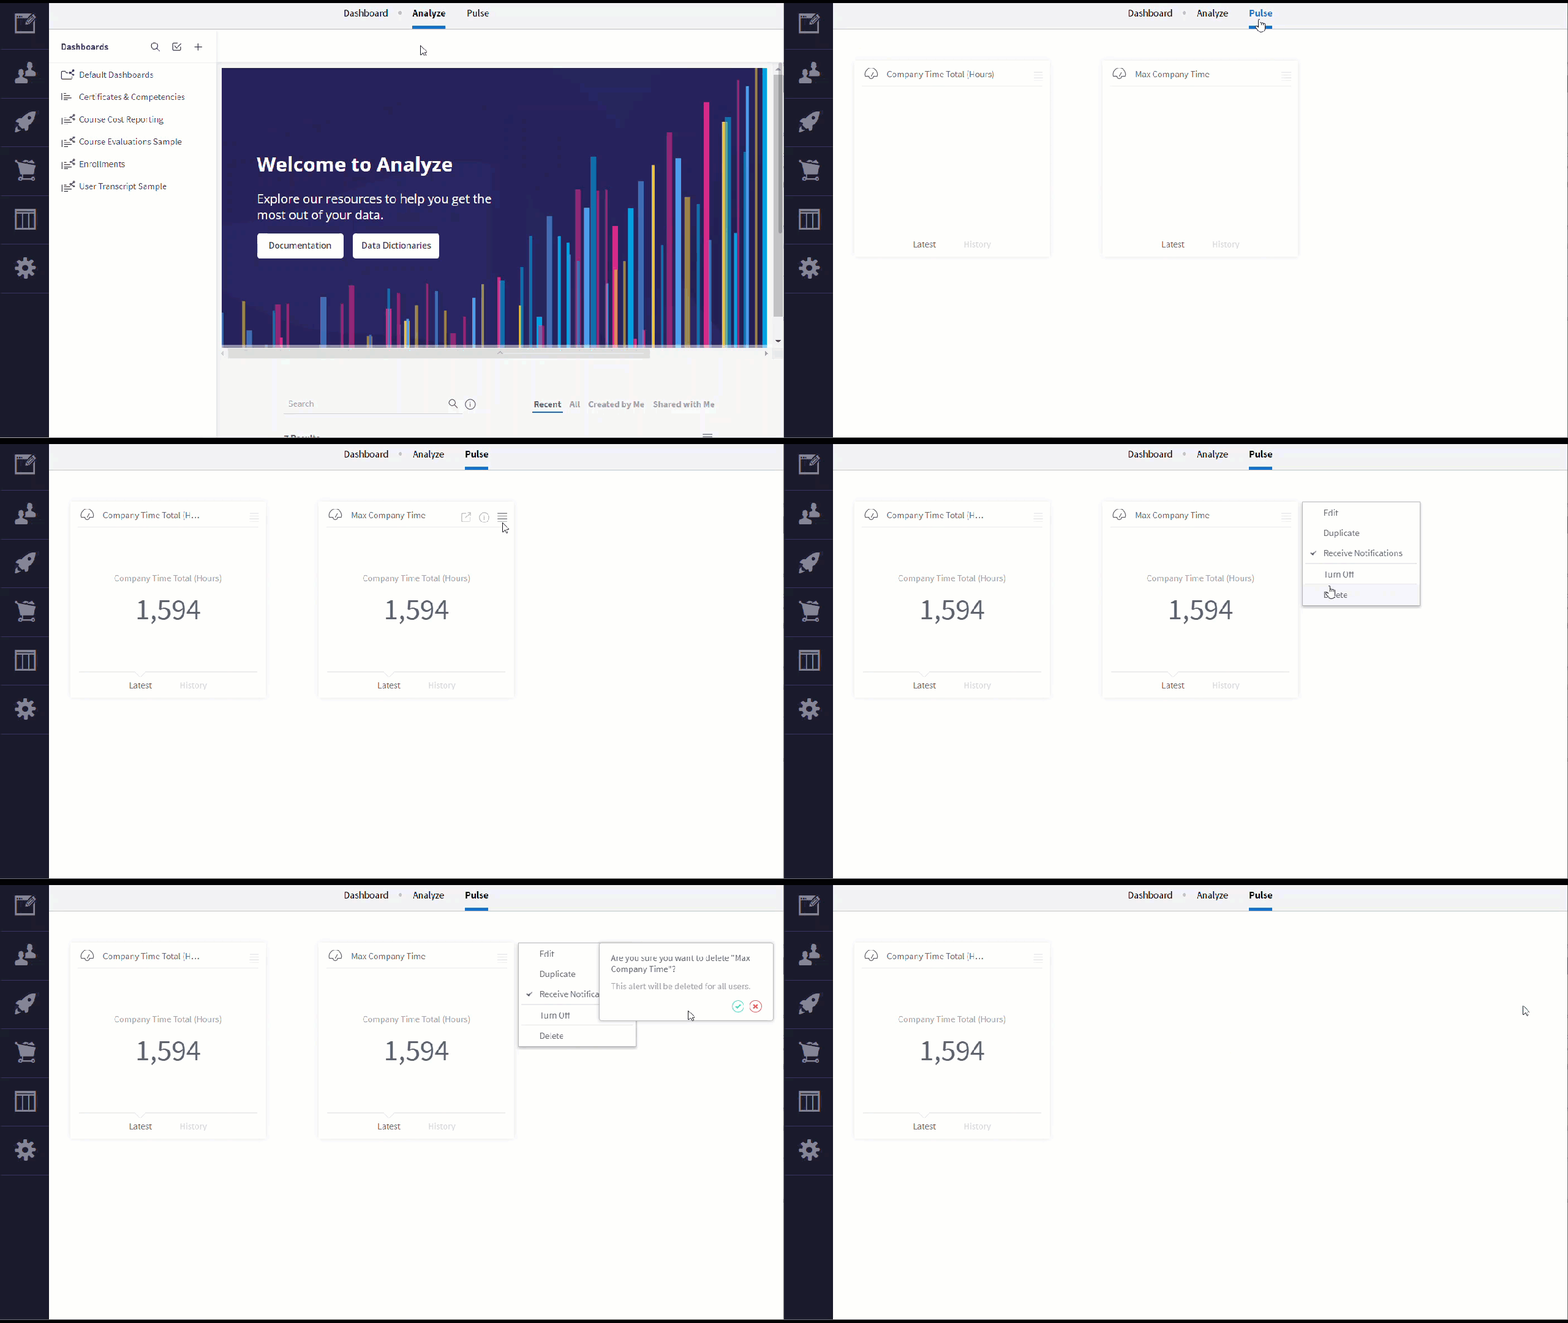
You are able to delete tiles on your Pulse dashboard when you no longer need to track them there. This will also delete the associated Alert, and Users will no longer be sent the associated notifications.
Steps to Delete a Pulse Tile:
Step 1: Navigate to the Pulse Dashboard from the main Analyze menu.
Step 2: Determine which tile you would like to delete, select "" on the top right of that tile, and then select Delete.
Step 3: A warning popup will appear asking if you are sure that you would like to delete the tile. If you are sure, then select the green checkmark. This will delete the tile from your Pulse Dashboard, and will delete the associate Alert for that tile.
Note: This will only delete the tile from your Pulse menu. It will not delete it from the dashboard that the tile originates from.
Data Alert Administration
You can create, duplicate, disable, and modify Alerts through the Pulse Dashboard. This section explains the administrative options available to you for Data Alerts.
You can set Alerts based on a threshold being passed or an anomaly being detected. For example, if you have an Indicator widget that represents total number of registrations, Pulse can notify you when the threshold you defined is met or exceeded.
Creating Data Alerts
Data alerts are triggered by conditions you define for your widgets. For example, if you have an Indicator widget that represents your company’s revenue, you can define an alert that notifies you when this revenue reaches or falls below a certain threshold. Analyze supports alerts for the following widgets:
- Indicator Widgets
- Area Chart Widgets
- Bar Chart Widgets
- Column Chart
- Line Chart
For each type of widget you can add to Pulse, you can monitor a single value. For example, for Column charts you can monitor a single section (value) of a column. To monitor multiple values, you can add each value you want to monitor to Pulse separately. When creating data alerts, you define the condition that triggers the alert. Analyze provides three alert conditions that can trigger an alert:
-
 Threshold: Analyze notifies you when a threshold is reached following a build. This condition is useful for monitoring metrics that follow a regular, cyclical schedule.
-
 Automatic: Analyze automatically notifies you when the Analyze alert engine identifies an anomaly in your data based on machine learning algorithms. The Analyze algorithm actively learns from your data and eliminates noise to identify anomalies in your data. Analyze anomaly detection is based on a smoothing algorithm that takes the latest values into account.
-
 Always: In addition, you can configure advanced settings that determine who receives the alert and what channel the alert is sent through.
Steps to Create a Data Alert:
Step 1: Navigate to the Dashboard that contains the data you would like to add to your Pulse dashboard.
Step 2: Determine which tile you would like to add, and then select "" on the top right of the tile. Then, select Add to Pulse. The Add to Pulse workspace will launch:
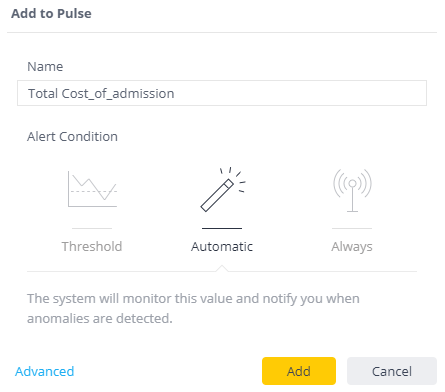
Step 3: In the Name field, enter a name for the alert. Give the alert a meaningful name that will enable others to identify the information that the Alert is associated with.
Step 4: In the Alert Condition area, select the condition that triggers the alert.
Step 5: Select the frequency in which you would like to be alerted. You can configure Analyze to check if the alert condition is met every x minutes, hours, or days.
Step 6: Click Add to create the alert. The alert is added to Analyze Pulse.
Data Alert Notification Customization
You are able to customize the notifications that are sent through Data Alerts. For example, you can customize the message, the channel through which they are sent, and the cadence of messages. This section explains the various options available to you.
Customizing Notification Messages
By default, the following message is provided in your email data alert notifications:
|
Hi, The latest value in the KPI that you are monitoring is: [Screenshot] [Data value] |
You can provide customized messages for your notifications when configuring your alert through the alert’s Advanced Settings. For example, if your message is “The last value of my KPI is:” the message in your alert’s notification will be:
|
Hi, The last value of my KPI is: [Data value] |
Steps to Customize your Notification’s Text:
Step 1: For Data Alerts, select Advanced >  .
.
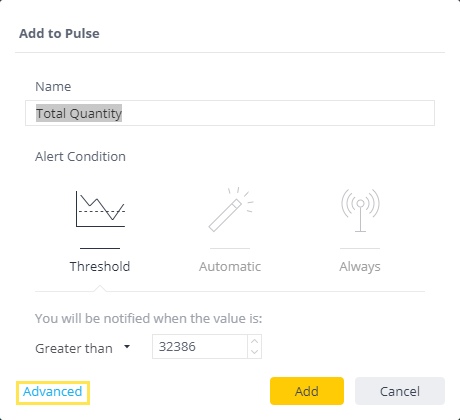
Step 2: In the Message area, enter your custom text.
Step 3: Click Save. The next time a notification is sent, your custom message is displayed in the notification.
Notifying Additional Users
When an alert is triggered, Administrators and Designers can notify additional Analyze users and groups by configuring the alert’s advanced settings. Viewers cannot share alerts with additional users. Users who are notified receive a notification through Analyze Pulse and any other additional channels you define.
Steps to Notify Additional Users:
For Data Alerts, select Advanced Options >  .
.
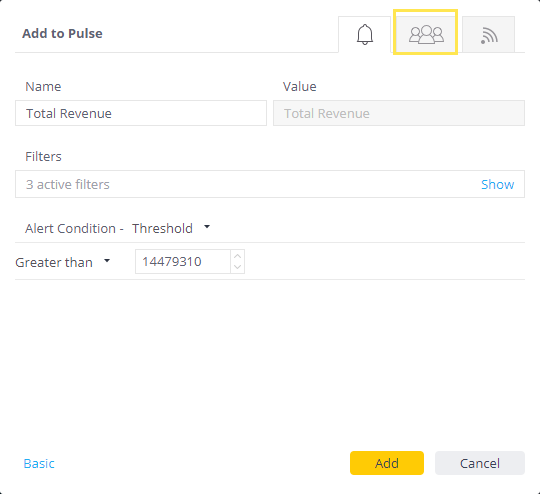
Step 1: Enter the email address, Analyze username, or group name of the users you want to notify when an alert is triggered. Entering Everyone specifies that all Analyze users and user groups associated with your account are notified. The contact information of the people you add is listed in the center of the window and is displayed the next time you open this window.
Step 2: Click Add to add the alert to Pulse.
Deactivating Your Notifications
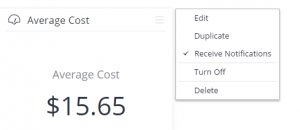
Each time you add a tile to Analyze Pulse or create an alert, by default, you will receive notifications when the event is triggered. If you do not want to receive any notifications, you can disable notifications from being sent by toggling the notifications. When you toggle the notifications, you no longer receive notifications when an alert is triggered, however, other users with whom the alert was shared will continue to be notified.
Steps to Deactivate Notifications for Yourself:
Step 1: In Analyze, select Pulse.
Step 2: From the Tile menu of the relevant alert, toggle Receive Notifications.
Deactivating Notifications for All Users
If you have added an alert that is no longer relevant or you want to deactivate the alert for all users, you can turn off the alert. If you turn off an alert, the no users will be notified when the event that triggers the alert occurs.
Steps to Deactivate Notifications for All Users:
Step 1: In the Analyze, select Pulse.
Step 2: From the Tile menu of the relevant alert, select Turn Off. A confirmation dialog box is displayed:
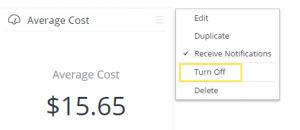
Step 3: Click Yes to confirm that you want to turn off all notifications for the alert. The alert is turned off. Alerts that have been turned off appear in the Pulse page as shaded tiles. You can reactivate the alert by selecting Turn On from the Tile menu.
Comments
Article is closed for comments.